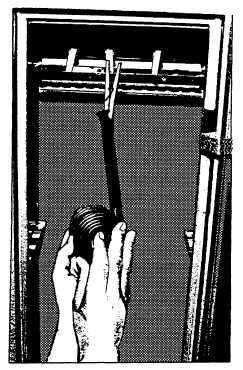
Figure 11-30.—Drying film in a drying cabinet
In Photography, printing is the term used to describe
the process of making positive images from negatives
(and, in some instances, from film positives). The most
familiar example is the print made on a paper base. A
photographic print is made by passing light through the
negative onto a piece of paper that is coated with a
light-sensitive emulsion very similar to film.
A contact print is produced by exposing a sheet of
photographic printing paper through a negative with the
paper emulsion and the emulsion side of the negative in
contact with each other. Light is directed through the
negative that controls the amount of light transmitted to
the paper. The dense areas of the negative pass less light
than do the more clear or less dense areas. The image
densities formed (after development) in the emulsion of
the paper make a positive print that represents the tonal
values of the original subject. Furthermore, since the
paper is in direct contact with the negative, the print
produced is exactly the same image size as the negative.
CONTACT PRINTERS
Contact printing is the quickest, simplest, and most
economical method of producing photographic prints.
For making proof prints and small volume printing, all
you need for a “contact printer” is a sheet of glass, a light
source, and some sort of padding.
For making contact proof prints and the occasional
contact print job, a glass and a supporting pad are all that
are necessary. “Contact printers,” consisting of a sheet
of glass hinged to a metal frame and a pad assembly, are
generally known as proof printers. If such a device is
not available or is not large enough for the negatives to
be contact printed, a piece of 1/4-inch plate glass and a
soft padding (such as a rubber typewriter pad) can be
used. Quarter-inch plate glass is heavy enough to keep
the negatives and paper flat and in contact during
exposure. The glass must be free of flaws, scratches,
bubbles and dirt.
CONTACT PRINTING PROCEDURE
Check the lamp to be sure it is operating properly.
Rinse the trays with fresh water, and prepare the
developer, stop bath and fixing solutions. The trays
should be larger than the prints to be produced, and one
of the largest or deepest trays available should be used
for the fixing bath.
When the solutions are ready, rinse and dry your
hands. A supply of printing paper should be available
and conveniently near the printer. Place an empty paper
box or paper safe near the printer if the prints are not to
be processed after each is exposed. Hold the paper in
these until the paper is ready to be processed. If the paper
is not stored in a paper box or paper safe, it will fog
eventually, even under safelight conditions.
Examining the Negative
The first requirement in making a good print is a
clean negative. The negative must then be examined to
determine the contrast (flat, normal or contrasty) and the
approximate exposure time required to produce a
quality print. As a novice darkroom worker, you may
not be able to make these determinations accurately.
However, in a short time, and with a little experience,
you will not have any trouble.
Selecting a Printing Filter
Your imaging facility should have a contrast
printing filter kit consisting of seven filters in half-step
increments from one to four. The number two filter is
normal contrast; any filter lower than two decreases the
contrast. A filter higher than two increases contrast.
In analyzing a negative to determine the most
suitable printing filter, be careful not to confuse contrast
with density. When in doubt, it is best to make test prints.
If the test print is contrasty, another test print should be
11-33


