303.57
Figure 11-12.–Cropping arms can be used to determine cropping.
be vertical. The one exception is the vertical lines of
buildings that naturally appear to converge. In this case,
the central vertical line, either real or imaginary, should
be rendered as vertical.
People or animals shown in profile or near profile
within a photograph should appear to be looking into the
picture, not out of it; for example, the subject should
have more picture area in front than behind.
Unless you are producing micro- or macro-
photography, the printed images should not normally be
larger than the actual size of the subject.
The image area of a picture should appear to have
a solid support. This effect can sometimes be achieved
by printing the lower part of the picture darker than the
upperpart
In a landscape or seascape picture, print the
foreground somewhat darker than the middle distance,
and print the middle distance darker than the far
distance. Then gradually increase the density of the sky
from the horizon upward. This creates a feeling or
illusion of depth.
A contact print (proof print) of the full negative to
be printed is helpful in determining the most effective
cropping for the picture.
Have available a set of cropping arms such as the
ones shown in figure 11-12. Cropping arms can be cut
from pieces of cardboard. Be sure the arms have true
right angles. You should use the following procedure to
crop or mark the proof print:
303.58
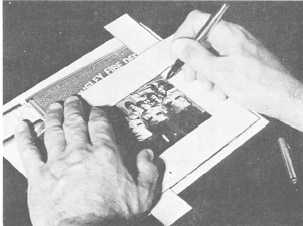
Figure 11-13.–Marking the print to be cropped.
1. Place the cropping arms over the proof print and
move them about until you have the desired cropping,
composition, and picture proportion or format.
2. With the cropping arms held in place on the
proof, mark the print with a grease pencil (or other
suitable marker) to outline the desired area or
composition of the picture (fig. 11-13). You should use
the marked proof print as a guide for setting up the
enlarger and easel.
3. With the negative in the enlarger and the
printing lamp turned on, adjust the enlarger for the
desired image size and cropping. Use the proof print
as a visual guide.
4. Adjust the adjustable masks on the easel to the
correct format and desired cropping. The adjustable
masking device on the easel should be adjusted so at
least a 1/4-inch white border is left on all four sides of
the finished print. Excess border can be cut off the print
after it is processed.
There may be occasions when you may want to
produce prints with borders larger than 1/4 inch or
with borders of various widths, such as 1/2 inch at
the top and sides and 1 1/2 inches at the bottom, or
you may want prints without borders or with black
borders. To make a print without borders, cut the
borders off after the print is processed or use a
borderless type of easel.
5. Adjust the picture composition by moving the
easel, by changing the border masks, or by changing the
picture enlargement or any combination of these until
11-16