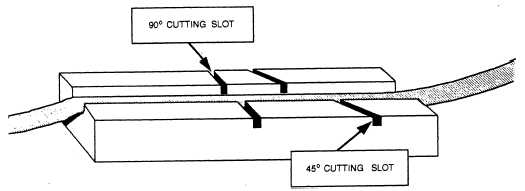
Figure 13-13.—Audiotape editing block.
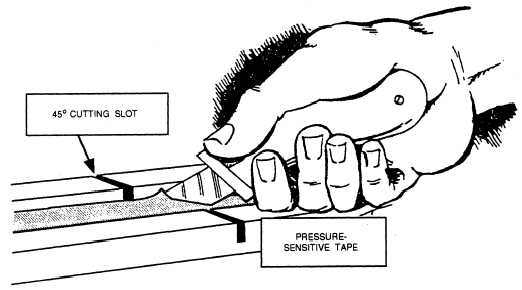
Figure 13-14.—Applying splicing tape.
45-degree cutting slot is to the right of the 90-degree
3. Cut the tape carefully with a razor blade, using
slot, as shown in figure 13-13.
Cut and splice the tape using the following
procedure:
1. Rewind the tape to the edit in point. Make sure
you unwind enough tape to be placed into the editing
block. Press the tape, oxide (dull) side down, into the
edit block so it is held in place by the grooved slots of
the block
2. Center the marked edit in point over the
45-degree cutting slot in the edit block, as shown in
figure 13-13.
NOTE: The 45-degree slot is most frequently used,
because it is a stronger bonding edit than one made from
a 90-degree vertical cut. The 45-degree angle cut also
reduces the chance of an audible popping sound at the
edit point during playback.
the diagonal slot as a guide. Remove the tape on the left
side of the cut.
4. Place the recorder into the edit mode and push
STOP once you find the edit out point. Unwind enough
tape to locate the edit out point and center it over the
45-degree cutting slot. Cut the tape carefully at the edit
mark with a razor blade.
5. Once you make the final cut, remove the loose
tape from the left side of the cut and set it aside until you
check the edit and run time of the program. You may
need to splice in this section later.
6. Push the remaining tape ends together in the edit
block so there is no gap or overlap. Join the two ends
using a piece of 7/32-inch splicing tape about one inch
in length (fig. 13-14). Press the splicing tape firmly over
the cut.
13-31


